Using Slug in URL with Django

I will show how we will use slug in our blog. So, what is this slug? A slug represents of the current page in the URL. Most of the time, the page title is used as a slug. There are too much examples to prove it. Well, my blog isn't big but it uses Blogger structure. This one of the examples as a slug from my blog post:
A slug as example

Also, if you look some questions from stackoverflow. You can see they use /question_id/slug-text structure for their URLs. We can find too much examples like this.

I'm going to apply this slug feature for my project that exists. Open models.py in the application folder called blog. Define a new field for Post model as slug:
....

class Post(models.Model):
    title = models.CharField(max_length=400)
    content = models.TextField()
    slug = models.SlugField(unique=True)
    pub_date = models.DateTimeField(auto_now_add=True)
    categories = models.ManyToManyField(Category)
    author = models.ForeignKey(User, on_delete=models.CASCADE)
    image = models.ImageField(upload_to='image/', null=True)
    
    def __str__(self):
        return self.title
    
    class Meta:
        ordering = ['-pub_date',]
        
...
I set unique as True to avoid url conflicts. However there are another two important points that I want emphazise them here. The first thing is about the posts already exist in the database. If we want to try to update this model in the database, probably it will cause a problem because of the old posts. In this point, we are in the second important thing that is about generating slug automatically. We can solve the problem with this solution. Also, we don't have to type custom slug all the time, this will be optional if you want. Therefore, I will override method called save in the post model:
from django.db import models
from django.contrib.auth.models import User
from django.utils.text import slugify

...

class Post(models.Model):
    title = models.CharField(max_length=400)
    content = models.TextField()
    slug = models.SlugField(blank=True, unique=True)
    pub_date = models.DateTimeField(auto_now_add=True)
    categories = models.ManyToManyField(Category)
    author = models.ForeignKey(User, on_delete=models.CASCADE)
    image = models.ImageField(upload_to='image/', null=True, blank=True)
    
    def save(self, *args, **kwargs):
        if not self.slug:
            self.slug = slugify(self.title)
        super(Post, self).save(*args, **kwargs)

    def __str__(self):
        return self.title
    
    class Meta:
        ordering = ['-pub_date',]
        
...
After these changes, I will update the database with makemigrations and then migrate command. I want to update url routing for the post detail view:
from django.urls import path
from .views import * 

urlpatterns = [
    path('', IndexView.as_view(), name="index"),
    path('about', about, name="about"),
    path('post/<slug:slug>/', DetailView.as_view(), name="detail"),
]
Probably, we can't open the old posts. So let's update these slug fields of the old posts in the admin panel:
slug in django admin panel

Save them like in the above and then open again old post in blog. I got this error about pk. Probably it's about comment. Because I call comments with pk value of the posts. Let's change it as slug and try again. I changed it DetailView:
....

class DetailView(generic.DetailView):
    model = Post
    template_name = 'detail.html'

    def get_context_data(self,**kwargs):
        context = super(DetailView,self).get_context_data(**kwargs)
        context['comments']=Comment.objects.all().filter(post = get_object_or_404(Post, slug=self.kwargs['slug']))
        return context

    def post(self, request, pk):
        post = get_object_or_404(Post, pk=pk)
        new_comment = Comment(
            username= request.POST.get('comment-username'), 
            content= request.POST.get('comment-textarea'),
            post = post
        )
        new_comment.save()
        return redirect(request.META['HTTP_REFERER'])
        
...
and the result is like this:
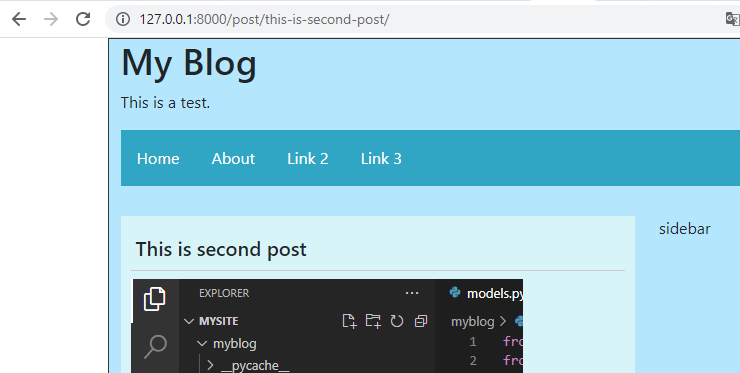
Slug in Django

So, let's create a new post but don't define a slug for it and yes we got it:
Django Slug Automatically

If we try to create post with same the post title, it will be occured error after the save operation. That's because we define slug field as unique. I think we've learned important information about slugs. Good work!

Read more »

Changing View as Generic View in Django

We have only used function-based views so far. I will use class-based generic views in this post. Also there are class-based views and function-based generic views.

Generic views are provides simpler use than normal views. We don't need to defining context, and no need to using render method. Because generic views will do this for us.

Firstly, I'm going to open views.py in the myblog application folder. I will also add a new view, because using two models (post, comment) in a single view is highly discouraged:

from django.db.models.fields import TimeField
from django.http.response import HttpResponseRedirect
from django.shortcuts import redirect, render, get_object_or_404
from django.urls import reverse
from django.views import generic

from .models import Post, Comment


# Create your views here.
class IndexView(generic.ListView):
    model = Post
    context_object_name = 'posts'
    template_name = 'index.html'


class DetailView(generic.DetailView):
    model = Post
    template_name = 'detail.html'

    def get_context_data(self,**kwargs):
        context = super(DetailView,self).get_context_data(**kwargs)
        context['comments']=Comment.objects.all().filter(post = self.kwargs['pk'])
        return context

    def post(self, request, pk):
        post = get_object_or_404(Post, pk=pk)
        new_comment = Comment(
            username= request.POST.get('comment-username'), 
            content= request.POST.get('comment-textarea'),
            post = post
        )
        new_comment.save()
        return redirect(request.META['HTTP_REFERER'])


def about(request):
    return render(request, 'about.html')
I removed comment view because we will use post method from DetailView instead of this view. You can understand why need to use class-based generic view in the above code example. According to views.py, let's edit urls.py:
from django.urls import path
from .views import * 

urlpatterns = [
    path('', IndexView.as_view(), name="index"),
    path('about', about, name="about"),
    path('post/<int:pk>/', DetailView.as_view(), name="detail"),
]
Also change comment form's action like that:
<form action="" method="post">
{% csrf_token %}
<fieldset>
    <legend><h6>Post a comment</h6></legend>
    <label for="usr">username:</label>
    <input type="text" class="form-control" id="usr" name="comment-username">
    <label for="usr">Type your comment:</label>
    <textarea class="form-control" rows="5" id="comment" name="comment-textarea"></textarea>
</fieldset>
<input type="submit" value="Send Comment">
</form>
That's it. We made changings in success. Notes:
  • We overrided get_context_data method to bind comment objects as context.
  • the post method run automatically when the form is submitted.
  • After added new commet object and saved on database, detail page will be refreshed by redirect function with the argument.
Read more »

Using Image in the Post with Django

We came how to use image in Django. We made a comment section for our blog, and we could add comment to the posts as well. An image file is actually static files. But, I'm not store them into the static folder, I will stored these files in folder called media. Why? Because the files will be uploaded from user. We don't use it for template design. If we use image for web design, then we should put on it in static folder. Firstly, I created A media folder in project base dir. After creating file, open the settings.py file from project folder:

MEDIA_ROOT = os.path.join(BASE_DIR, 'media')

MEDIA_URL = '/media/'
We need to add this media folder url to the main urls.py file:
from django.contrib import admin
from django.urls import path, include
from django.conf import settings
from django.conf.urls.static import static

urlpatterns = [
    path('admin/', admin.site.urls),
    path('', include('myblog.urls')),
]

urlpatterns += static(settings.MEDIA_URL, document_root=settings.MEDIA_ROOT)
So, let's edit our post model in the models.py:
class Post(models.Model):
    title = models.CharField(max_length=400)
    content = models.TextField()
    pub_date = models.DateTimeField(auto_now_add=True)
    categories = models.ManyToManyField(Category)
    author = models.ForeignKey(User, on_delete=models.CASCADE)
    image = models.ImageField(upload_to='images/', null=True)
    
    def __str__(self):
        return self.title
    
    class Meta:
        ordering = ['-pub_date',]
We have already defined media folder and upload_to makes the images will be uploaded to media/images/ automatically. Let's save this model in the database because we changed it:

 
upload image in Django

I uploaded an example image from the admin panel. You can see this image  is uploaded in the images folder in the media folder.

Let's show this image in the detail page of each post, if it exist. I will open the detail.html file and I will edit like that:
{% extends '_base_layout.html' %}

{% block content %}
<div class="row">
    <div class="col-sm-9">
        <div class="page">
            <h5 class="post-title">{{ post.title }}</h5>
            {% if post.image  %}
            <div class="post-image">
                <img src="{{ post.image.url }}">
            </div>
        {% endif %}
            <p>{{ post.content }}</p>
        </div>
        {% include 'comment.html' %}
    </div>
    <div class="col-sm-3">
        sidebar
    </div>
</div> 
{% endblock %}
The result is like that:
Uploaded Image in Django
That's nice. If you get the error about pillow, you have to install pillow module as a solution.

But this is not for production Django project. This post is just for development stage of Django.

Read more »

Create Comment Form with Django

We made comment section for post detail pages in the previous post. We are going to create comment form for this section, and we are going to able to post comment from the post page.

I will create a new file called comment_form.html in templates folder and I edited to comment.html like in the below:

<div class="comment-area">
    <div class="comment-header">
        <h5 class="comment-main-title">Comments</h5>
    </div>
    <div class="comment-content">
        {% for comment in comments %}
            <div class="media border p-3 comment-box">
                <!-- <img src="img_avatar3.png" alt="{{ comment.username }}" class="mr-3 mt-3 rounded-circle comment-image-of-user" style="width:60px;"> -->
                <div class="media-body comment-text">
                <h6 class="comment-username"> {{ comment.username }} <small class="comment-date"><i>Posted {{ comment.pub_date }}</i></small></h6>
                <p>{{ comment.content }}</p>      
                </div>
                <div class="clear"></div>
            </div>
        {% endfor %}
        </ul>
    </div>
    <div class="comment-form">
        {% include 'comment_form.html' %}
    </div>
</div>
Now, let's start to type comment form in the comment_form.html:
<form action="{% url 'comment' pk=post.pk %}" method="post">
{% csrf_token %}
<fieldset>
    <legend><h6>Post a comment</h6></legend>
    <label for="usr">username:</label>
    <input type="text" class="form-control" id="usr" name="comment-username">
    <label for="usr">Type your comment:</label>
    <textarea class="form-control" rows="5" id="comment" name="comment-textarea"></textarea>
</fieldset>
<input type="submit" value="Send Comment">
</form>
{% csrf_token %} is about security to avoid CSRF attacks. I'm not familiar with that but we should type this after start of form tag with post action.

Look at the action, I gave a url with post primary key. This primary key is actually a parameter which will be sent to the view function. 'comment' statement is name of url which will defined in urlspatterns list in the application folder will points the view function to activate. Also, there is a post method, this is http request method. If we want to give datas from the form, this operation will happen with post http request method. I added input which will be contain author's name of the comment, and textarea added for comment content which can be typed. These input and textarea tag must contain name parameter for getting data with post method from the view function. Lastly, the last button will triggered to the action and the request will be executed. 

Let's type the view called comment in the views.py:
from django.db.models.fields import TimeField
from django.http.response import HttpResponseRedirect
from django.shortcuts import render, get_object_or_404
from django.urls import reverse

from .models import Post, Comment

...

def comment(request, pk):
    post = get_object_or_404(Post, pk=pk)
    new_comment = Comment(
        username=request.POST.get('comment-username'), 
        content=request.POST.get('comment-textarea'),
        post = post
    )
    new_comment.save()
    return HttpResponseRedirect(reverse('detail', args=(str(post.pk))))
I created a new comment object and post request provides necessary data from the comment form and also post as foreign key.  After that, the object will saved with save method in the database. The page will be redirect to the same page. I used reverse function. This function takes the other view name and also its arguments.

Finally, we will add this view to the urls.py in the application folder:
urlpatterns = [
    path('', index, name="index"),
    path('about', about, name="about"),
    path('post/<int:pk>/', detail, name="detail"),
    path('post/<int:pk>/comment', comment, name="comment"),
]
So, let's try on the page:
Comment Form in Django
Finally, I could add a comment with comment form from the webpage. However, I'm not sure the things what I did is really secure and reliable. I said that because I'm a new learner of Django as server-side. We'll see what happen in the next. Good work! 
Read more »

Creating Comment Section for Blog in Django

Almost each blog has comment section for each post below, and because of that I want to add this too. Let's think about comment. Each post contains none or one comment or one more comments. If the post is deleted then all comments related must be deleted. I will try to make this with model called Comment. Let's create this model at first:
class Comment(models.Model):
    username = models.CharField(max_length=30)
    comment_content = models.TextField()
    pub_date = models.DateTimeField(auto_now_add=True)
    post = models.ForeignKey(Post, on_delete=models.CASCADE)
Now, we have to save and apply this model in the database:
../mysite> python manage.py makemigrations
../mysite> python manage.py migrate
Add this model to admin panel in admin.py that is in the application folder:
from django.contrib import admin
from .models import Category, Post, Comment

# Register your models here.
admin.site.register(Post)
admin.site.register(Category)
admin.site.register(Comment)
I'm going to admin panel and I created some comments as examples for posts. Now, let's create a template for comment section called comment.html:
<div class="comment-area">
    <div class="comment-header">
        <h5 class="comment-main-title">Comments</h5>
    </div>
    <div class="comment-content">
        <!-- will be edit -->
    </div>
</div>
But we can not get comments from models if we don't give this model to the detail view as context element:
from django.shortcuts import render, get_object_or_404
from .models import Post, Comment

# Create your views here.
...

def detail(request, pk):
    post = get_object_or_404(Post, pk=pk)
    comments = Comment.objects.filter(post__pk = pk)

    context = {
        'post' : post,
        'comments' : comments,
    }
    return render(request, 'detail.html', context)
    
...
Let's edit our template called comment.html:
<div class="comment-area">
    <div class="comment-header">
        <h5 class="comment-main-title">Comments</h5>
    </div>
    <div class="comment-content">
        <ul>
        {% for comment in comments %}
            <li>{{ comment.content }}</li>
        {% endfor %}
        </ul>
    </div>
</div>
That works:
comments in django

They don't look good. I want to add this each comment in media component from Bootstrap:
<div class="comment-area">
    <div class="comment-header">
        <h5 class="comment-main-title">Comments</h5>
    </div>
    <div class="comment-content">
        {% for comment in comments %}
            <div class="media border p-3">
                <img src="img_avatar3.png" alt="{{ comment.username }}" class="mr-3 mt-3 rounded-circle" style="width:60px;">
                <div class="media-body">
                <h6> {{ comment.username }} <small><i>Posted on February 19, 2016</i></small></h6>
                <p>{{ comment.content }}</p>      
                </div>
            </div>
        {% endfor %}
        </ul>
    </div>
</div>
And the final result is like in the following image:
comment in Django
I should some make up this comment area at first without starting to form application. I updated comment.html file:
<div class="comment-area">
    <div class="comment-header">
        <h5 class="comment-main-title">Comments</h5>
    </div>
    <div class="comment-content">
        {% for comment in comments %}
            <div class="media border p-3 comment-box">
                <img src="img_avatar3.png" alt="{{ comment.username }}" class="mr-3 mt-3 rounded-circle comment-image-of-user" style="width:60px;">
                <div class="media-body comment-text">
                <h6 class="comment-username"> {{ comment.username }} <small class="comment-date"><i>Posted on February 19, 2016</i></small></h6>
                <p>{{ comment.content }}</p>      
                </div>
                <div class="clear"></div>
            </div>
        {% endfor %}
        </ul>
    </div>
</div>
After that, I typed this css code for better view in styles.css:
/* comment */
.comment-area{
    margin-top: 30px;
}

.comment-content{
    margin-top: 20px;
}

.comment-box{
    background-color: #eee;
    border: 1px solid #ccc;
    margin-bottom: 20px;
}

.comment-image-of-user{
    float:left;
    width:60px;
    height:60px!important;
    border:1px solid #ccc;
}

.comment-text{
    margin-left:80px;
}

.comment-username{
}

.comment-date{
    float:right;
}
Let's look at the result:
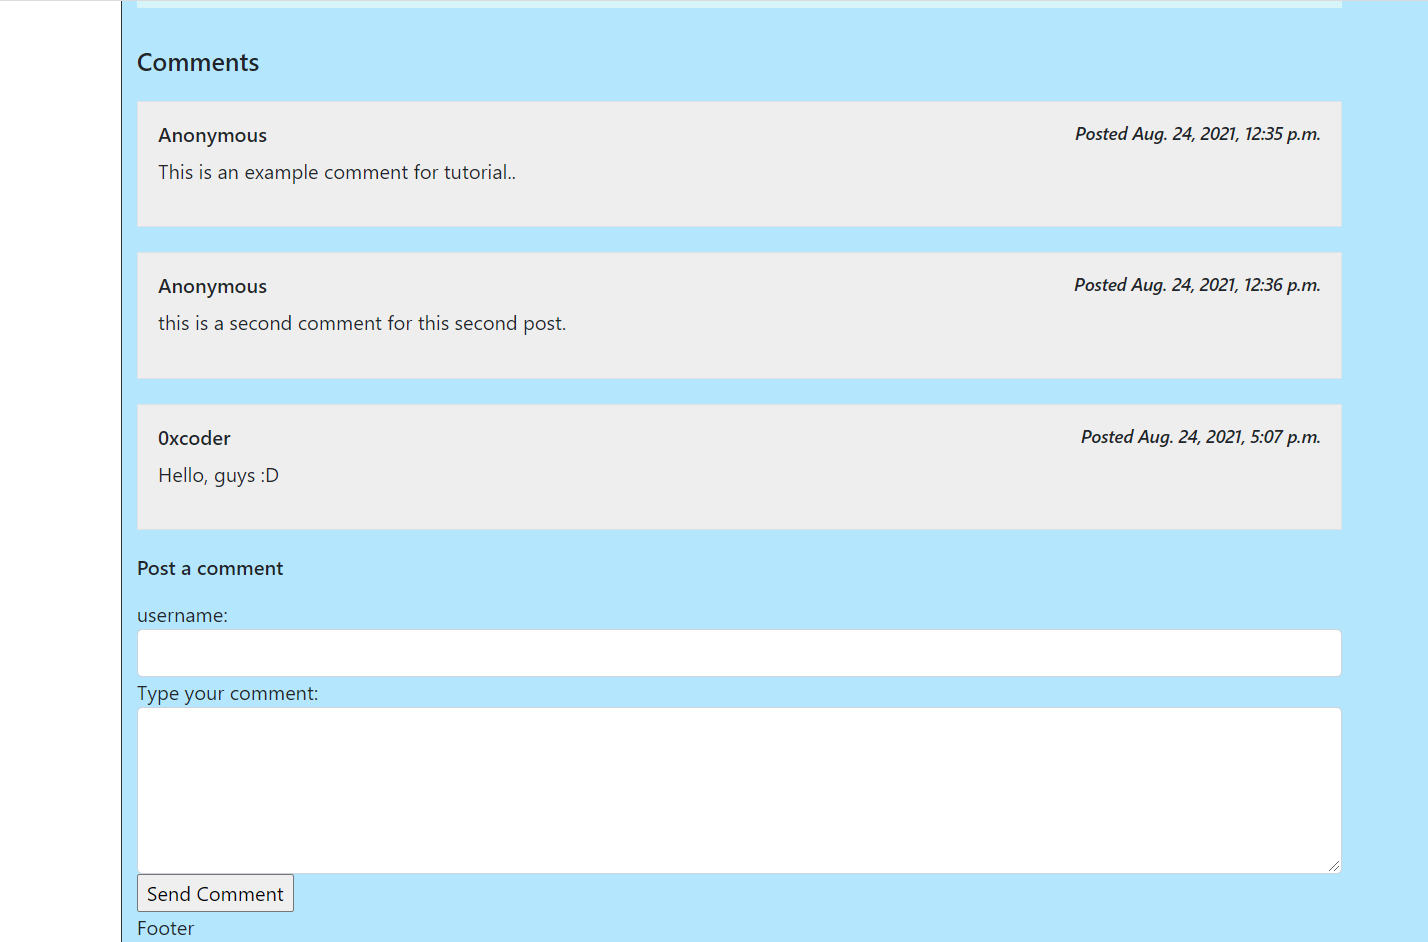
Comment in Django

Well, that's not cool. Because I have not appy media for this project, I will do it in the next posts. So I will take img html tag in comment line, but don't remove it, we will use it. Also I changed comment date like in the following image, they show real date from database. (clue {{ comment.pub_date }}):
Comment in Django

That's cool, now we can start build comment form. But this post is too long. I will added comment form in the next post. Good work!
Read more »

Adding Custom 404 Page Not Found in Django

The posts that already exist can be seen in own detail pages. But what if some users want to try open the posts that doesn't exist, or maybe we had a post from past but we deleted it. However, some links can point this deleted post. In this case, we should use 404 page.

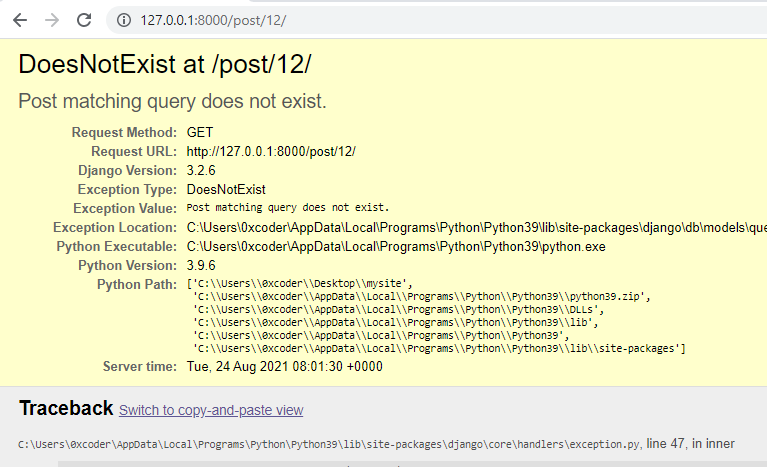
Let's try open the post that not exist with url link:

DoesNotExist Django

This is not what we want to show when the post doesn't exist. Open the views.py in the application called blog and import Http404:
from django.http import Http404
from django.shortcuts import render
from .models import Post

...

def detail(request, pk):
    try:
        post = Post.objects.get(pk=pk)
    except Post.DoesNotExist:
        raise Http404("There's nothing like that")
        
    context = {
        'post' : post,
    }
    return render(request, 'detail.html', context)
And that's what we got:
Page not found (404)

Also, Django provides short way for raising 404. This is a shortcut called get_object_or_404() and we can use it:
from django.shortcuts import render, get_object_or_404
from .models import Post

...

def detail(request, pk):
    post = get_object_or_404(Post, pk=pk)
    
    context = {
        'post' : post,
    }
    return render(request, 'detail.html', context)
That's okay, but how we can add our custom template for 404. I created 404.html file in templates, Django has already know this template for in its built-in views:
{% extends '_base_layout.html' %}

{% block content %}
<div class="row">
    <div class="col-sm-12">
        <div class="page">
            <h1>404 - Page Not Found</h1>
        </div>
    </div>
</div> 
{% endblock %}
But probably we can't see this custom page because of debug mode as true. Therefore, I'm going set DEBUG as false and after that ALLOWED_HOST should be changed like in the below:
# SECURITY WARNING: don't run with debug turned on in production!
DEBUG = False

ALLOWED_HOSTS = ['*']
Now, let's check 404 page not found:
Custom 404 Page not found in Django

Finally, we got it. Also, we can give some style to this page via styles.css. Good work!
Read more »

Giving Style to Blog with Django

We already got progress on Django. I made a blog application in this tutorial. Of course, this project is unfinished. That's is a journey to completion of the project. In this post, I'm going to give style our blog. But this will be optional for you. You can give different styles compared to what I gave. I already used Bootstrap in the project. So, this will be very helpful. I'm going to use CSS file called styles.css that I already added our template as static file. You can see here:

{% load static %}

<!DOCTYPE html>
<html>
    <head>
        <title>My Blog</title>
        <meta charset="utf-8">
        <meta name="viewport" content="width=device-width, initial-scale=1">
        <link rel="stylesheet" href="{% static 'styles.css' %}">
        <link rel="stylesheet" href="{% static 'css/bootstrap.min.css' %}">
        <script src="{% static 'js/jquery.min.js' %}"></script>
        <script src="{% static 'js/bootstrap.min.js'%}"></script>
    </head>
    <body>
    ...
styles.css file is in static folder. Now, let's run the server and let's look at the page how does it look:

I will give some styles to the post card. We need to class name to do that in the related html files. Firstly, I opened index.html file and I added new class name to the div:
{% extends '_base_layout.html' %}

{% block content %}
<div class="row">
    <div class="col-sm-9">
        {% for post in posts %}
            <div class="card post-preview">
                <div class="card-body post-body">
                    <h5 class="card-title post-title">
                        <a href="{% url 'detail' pk=post.pk %}">{{ post.title }}</a> 
                     </h5>
                    <p class="card-text post-summary"> {{ post.content }} </p>
                    <a href="#" class="btn btn-primary post-readmore">Read more..</a>
                </div>
            </div>
        {% endfor %}
    </div>
    <div class="col-sm-3">Sidebar</div>
</div> 
{% endblock %}
I added new class names to make easier to manipulate them using CSS. The post cards looks like very attached to each other and so primitive. According to these class names, I will change this view of post cards in the index page. I opened styles.css file:

/* blog post card */
.post-preview{
    background-color: rgb(215, 244, 248);
    margin-bottom: 15px;
    border: 1px solid #999;

}

.post-body{ 

}

.post-title{
    padding: 10px 5px;
    border-bottom: 1px solid #ccc;
}

.post-title a{
    color: #000;
    text-decoration: none;
}

.post-summary{
    font-size: 14px;
    padding: 5px;
}

.post-readmore{
    background-color: #333;
    font-size: 14px;
    font-weight: 600;
    padding: 5px;
    float: right;
    border: none;
}

.post-readmore:hover{
    background-color: #000;
    font-size: 14px;
    font-weight: 600;
    padding: 5px;
    float: right;
    border: none;
}
And the result:
style of the blog

I know it's not good really. But the important thing is how do we do that. I will do it other sections myself. In the next post, I will give css code. Probably I will share it on GitHub.
Read more »

Create a Blog Application with Django

In this post, we are going to create our blog using Django. Firstly, Python and Django must be installed on the computer. You can download it from Django official website, also you can learn how to install it on your computer.

I will use Windows operating system when I will make this application. So let's create our project at first:

C:\Users\0xcoder\Desktop>django-admin startproject mysite
After this command, There will be a folder called mysite on the desktop. In this folder, there is a manage.py folder for running our website on the local server and other necessary things as operations. Also there is a folder named mysite again. In this folder, there are project files called, __init__.py, asgi.py, settings.py, urls.py, wsgi.py. Currently, urls.py and settings.py are important for us. settings.py file contains settings about project and urls.py contains a list like redirect to this view if the user requests the following url. You can get much information from this page. Let's get inside this mysite folder:
C:\Users\0xcoder\Desktop>C:\Users\0xcoder\Desktop>cd mysite

C:\Users\0xcoder\Desktop\mysite>dir
 Volume in drive C has no label.
 Volume Serial Number is 3C09-3D8E

 Directory of C:\Users\0xcoder\Desktop\mysite

08/21/2021  01:26 PM    <DIR>          .
08/21/2021  01:26 PM    <DIR>          ..
08/21/2021  01:26 PM               684 manage.py
08/21/2021  01:26 PM    <DIR>          mysite
               1 File(s)            684 bytes
               3 Dir(s)  88,329,146,368 bytes free
Let's test it our website with this command:
C:\Users\0xcoder\Desktop\mysite> python manage.py runserver
Our website should be worked on the local server(http://127.0.0.1:8000/). 

There are some important information we need to know about Django:
  • The software design pattern of Django is MVT (Model - View - Template). Model is a structure representing the table. View is the part that creates the logical structure. The structure that provides the relationship between the model and the template. Template is a static file like html file.
  • Django has ORM Architecture (Object-Relational Mapping). This is about Models in Django. We don't need to type database tables with SQL. We can just use Python to create class as a model that will be a table on the database. 
So, we want to make a blog. Therefore, we need to model called Post. This post is a model but it's actually a table on the database. But firstly we have to create an application called myblog:
C:\Users\0xcoder\Desktop\mysite> django-admin startapp myblog
We created first application in the project. Everything should be piecemeal in Django. This is a very useful type of usage. Also you can use this application the Django projects. We actually created our Django module. Let's check out the files of this application.
Django Application Files
In admin.py, we are going to add our model to admin panel also we can update view of these models. This apps.py contains application configurations. models.py contains the application models like post, user, comment, etc.. tests.py is for testing our Django project. views.py contains the applications view functions and classes. You can get more information from this page. 

I'm going to use Visual Studio Code as code editor. I will open this project like this:
C:\Users\0xcoder\Desktop\mysite> code .
Let's create a model called post in models.py:
from django.db import models
from django.contrib.auth.models import User

# Create your models here.
class Category(models.Model):
    name = models.CharField(max_length=100, unique=True)
    def __str__(self):
        return self.name

class Post(models.Model):
    title = models.CharField(max_length=400)
    content = models.TextField()
    pub_date = models.DateTimeField(auto_now_add=True)
    categories = models.ManyToManyField(Category)
    author = models.ForeignKey(User, on_delete=models.CASCADE)
We created our models which are Category and Post. Post model contains five fields. We know what are the first three fields already. Each post can have category and more categories. Also it should be a model as parameter to use it our Post model. So, I created Category model. Also each post must have one author. I did not create a model for user, because Django already provides this model as default. But, you can create your user model. We created these models but these models are not known by database. We have to save this models as table on the database. However Django does not know we have an application in project. Therefore we need to install this application at first. Open settings.py in the project folder:
INSTALLED_APPS = [
    'django.contrib.admin',
    'django.contrib.auth',
    'django.contrib.contenttypes',
    'django.contrib.sessions',
    'django.contrib.messages',
    'django.contrib.staticfiles',
    'myblog.apps.MyblogConfig',
]
Now, we should understand why we need to apps.py in application. Okay, now we can save our models as migration at first:
C:\Users\0xcoder\Desktop\mysite>python manage.py makemigrations
Migrations for 'myblog':
  myblog\migrations\0001_initial.py
    - Create model Category
    - Create model Post
After this command, we need to save this migrations as table in database:
C:\Users\0xcoder\Desktop\mysite>python manage.py migrate
Operations to perform:
  Apply all migrations: admin, auth, contenttypes, myblog, sessions
Running migrations:
  Applying contenttypes.0001_initial... OK
  Applying auth.0001_initial... OK
  Applying admin.0001_initial... OK
  Applying admin.0002_logentry_remove_auto_add... OK
  Applying admin.0003_logentry_add_action_flag_choices... OK
  Applying contenttypes.0002_remove_content_type_name... OK
  Applying auth.0002_alter_permission_name_max_length... OK
  Applying auth.0003_alter_user_email_max_length... OK
  Applying auth.0004_alter_user_username_opts... OK
  Applying auth.0005_alter_user_last_login_null... OK
  Applying auth.0006_require_contenttypes_0002... OK
  Applying auth.0007_alter_validators_add_error_messages... OK
  Applying auth.0008_alter_user_username_max_length... OK
  Applying auth.0009_alter_user_last_name_max_length... OK
  Applying auth.0010_alter_group_name_max_length... OK
  Applying auth.0011_update_proxy_permissions... OK
  Applying auth.0012_alter_user_first_name_max_length... OK
  Applying myblog.0001_initial... OK
  Applying sessions.0001_initial... OK
We saved our models in database. I want to see my tables that I created on the admin panel. But, I have to make some operation for this. Firstly, I have to add this models to see them in admin page. Let's open admin.py files in myblog application:
from django.contrib import admin
from .models import Category, Post

# Register your models here.
admin.site.register(Post)
admin.site.register(Category)
In order to enter the admin panel, we need to create a user:
C:\Users\0xcoder\Desktop\mysite>python manage.py createsuperuser
Username (leave blank to use '0xcoder'): 0xcoder
Email address:
Password:
Password (again):
Superuser created successfully.
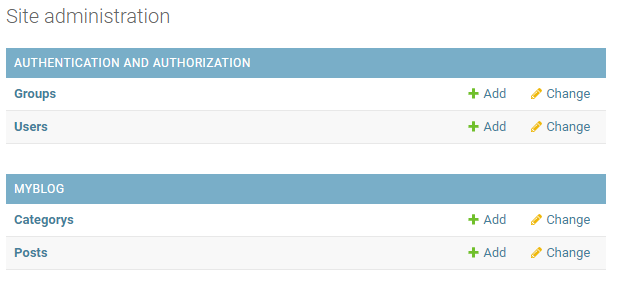
After creation of Superuser, run the server and open this url http://127.0.0.1:8000/admin. Login with your superuser username and password to admin panel. You should see these models on your admin panel:
Models in Admin Panel

I created a first post as example:
Form Model in Admin Panel
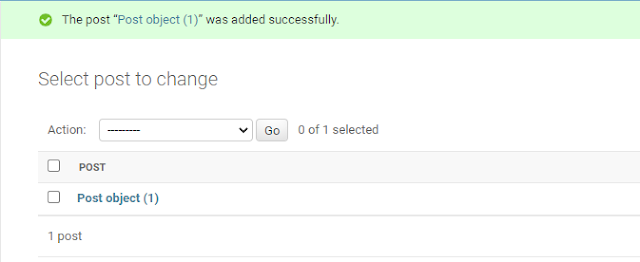
When you save it, you should see this output:
Title of Model Object in Admin Panel

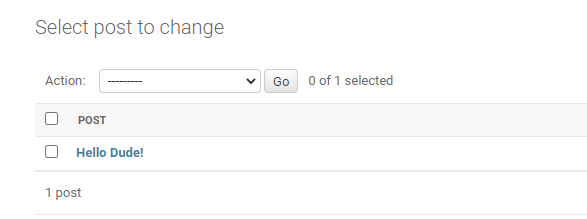
This is normal. I already added this feature to Category model. Post title should be seen instead of "Post object (number)". To do this, lets open models.py and added __str__ function to the Post class like this:
class Post(models.Model):
    title = models.CharField(max_length=400)
    content = models.TextField()
    pub_date = models.DateTimeField(auto_now_add=True)
    categories = models.ManyToManyField(Category)
    author = models.ForeignKey(User, on_delete=models.CASCADE)

    def __str__(self):
        return self.title
After this update operation, refresh admin page:
Title of Model Object in Admin Panel
That's a good progress. Let's create our first view with template. Firstly I created a folder called templates in the application. 
Directory of the project in the Visual Studio Code

Create a new file called index.html in this folder:
<!DOCTYPE html>
<html>
    <head>
        <title>My Blog</title>
    </head>
    <body>
        <h1>My Blog</h1>
    </body>
</html>
Let's create our first view in views.py:
from django.shortcuts import render

# Create your views here.
def index(request):
    return render(request, 'index.html')
Now, we have to make URL routing for index view. Primarily, I'm creating a file named urls.py in the application:
from django.urls import path
from .views import index

urlpatterns = [
    path('/', index),
]
But, we have to state this urlpatterns list to the original urlpatterns list that is in project directory:
from django.contrib import admin
from django.urls import path, include

urlpatterns = [
    path('admin/', admin.site.urls),
    path('', include('myblog.urls')),
]
When we run the project, the result should be like that:
Preview on blog
But templates folder shouldn't be there for this project. I will located it in mysite main directory like this:
  • mysite + 
    • mysite +
    • myblog +
    • templates +
    • db.sqlite3
    • manage.py
After this operation, we have to specify this templates folder in settings.py.  Open the settings.py:
TEMPLATES = [
    {
        'BACKEND': 'django.template.backends.django.DjangoTemplates',
        'DIRS': [os.path.join(BASE_DIR, 'templates')],
        'APP_DIRS': True,
        'OPTIONS': {
            'context_processors': [
                'django.template.context_processors.debug',
                'django.template.context_processors.request',
                'django.contrib.auth.context_processors.auth',
                'django.contrib.messages.context_processors.messages',
            ],
        },
    },
]
Let's run the server again. You should get same template in the webpage.

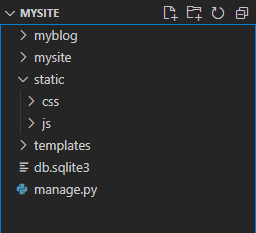
Also, we need to use CSS and JS files in our website. These files are static files. Therefore, we need to create folder called static in mysite directory:
  • mysite + 
    • mysite +
    • myblog +
    • static +
    • templates +
    • db.sqlite3
    • manage.py
Now, we need to specify this folder in settings.py as static. Open the settings.py file and type this code:
STATICFILES_DIRS = [os.path.join(BASE_DIR, 'static'), ]
I need to some static files. I downloaded Bootstrap files from their official website and I added these files in static folder:
Directory of project in django

Now, we can use our static files in html file:
{% load static %}

<!DOCTYPE html>
<html>
    <head>
        <title>My Blog</title>
        <meta charset="utf-8">
        <meta name="viewport" content="width=device-width, initial-scale=1">
        <link rel="stylesheet" href="{% static 'css/bootstrap.min.css' %}">
        <script src="{% static 'js/jquery.min.js' %}"></script>
        <script src="{% static 'js/bootstrap.min.js'%}"></script>
    </head>
    <body>
        <div class="container">
            <h1>My Blog</h1>
            <p>This is a test.</p>
        </div>
    </body>
</html>
Let's check out the webpage again:
Preview on blog
That's cool. However, we will have more pages in this blog and there are common areas for these pages like header, footer, etc. We shouldn't type this same code to each html files. As a solution, we can use partials way. Let's create a file called _base_layout.html in templates folder and I cut this code from index.html to _base_layout.html:
{% load static %}

<!DOCTYPE html>
<html>
    <head>
        <title>My Blog</title>
        <meta charset="utf-8">
        <meta name="viewport" content="width=device-width, initial-scale=1">
        <link rel="stylesheet" href="{% static 'styles.css' %}">
        <link rel="stylesheet" href="{% static 'css/bootstrap.min.css' %}">
        <script src="{% static 'js/jquery.min.js' %}"></script>
        <script src="{% static 'js/bootstrap.min.js'%}"></script>
    </head>
    <body>
        <div class="container">
            <header>
                <div class="row">
                    <div class="col-sm-12">
                        <h1>My Blog</h1>
                        <p>This is a test.</p>
                    </div>
                </div>
            </header>
            <!-- header end -->

            {% block content %}
            {% endblock %}

            <!-- footer start -->
            <footer>
                <div class="row">
                    <div class="col-sm-12">Footer</div>
                </div> 
            </footer>

        </div>
    </body>
</html>
We created our base_layout. Now let's extend this html file in other files. I will extend it from index.html:
{% extends '_base_layout.html' %}

{% block content %}
<div class="row">
    <div class="col-sm-9">Content</div>
    <div class="col-sm-3">Sidebar</div>
</div> 
{% endblock %}
I want to add a navbar my template. Firstly, I created _navbar.html in templates folder:
<nav class="navbar navbar-expand-sm bg-light">
    <!-- Links -->
    <ul class="navbar-nav">
        <li class="nav-item">
            <a class="nav-link" href="#">Link 1</a>
        </li>
        <li class="nav-item">
            <a class="nav-link" href="#">Link 2</a>
        </li>
        <li class="nav-item">
            <a class="nav-link" href="#">Link 3</a>
        </li>
    </ul>
</nav>
After that, I will edit base_layout.html and I will use it include for adding navbar:
{% load static %}

<!DOCTYPE html>
<html>
    <head>
        <title>My Blog</title>
        <meta charset="utf-8">
        <meta name="viewport" content="width=device-width, initial-scale=1">
        <link rel="stylesheet" href="{% static 'styles.css' %}">
        <link rel="stylesheet" href="{% static 'css/bootstrap.min.css' %}">
        <script src="{% static 'js/jquery.min.js' %}"></script>
        <script src="{% static 'js/bootstrap.min.js'%}"></script>
    </head>
    <body>
        <div class="container">
            <header>
                <div class="row">
                    <div class="col-sm-12">
                        <h1>My Blog</h1>
                        <p>This is a test.</p>
                    </div>
                </div>
            </header>
            <!-- header end -->

            {% include '_navbar.html' %}

            {% block content %}
            {% endblock %}

            <!-- footer start -->
            <footer>
                <div class="row">
                    <div class="col-sm-12">Footer</div>
                </div> 
            </footer>

        </div>
    </body>
</html>
And the result is like this:
Preview on blog

I want to add "about page" on my blog. I opened views.py in the application and I created a new view for about page:

from django.shortcuts import render

# Create your views here.
def index(request):
    return render(request, 'index.html')

def about(request):
    return render(request, 'about.html')
After that, I will add this view in urls.py file in the application:
from django.urls import path
from .views import * 

urlpatterns = [
    path('', index),
    path('about', about, name="about"),
]
Let's create a new html file called about.html:
{% extends '_base_layout.html' %}

{% block content %}
<div class="row">
    <div class="col-sm-12">
        <h1>About</h1>
    </div>
</div> 
{% endblock %}
Let's look at the result (Don't remember edit _navbar.html file):
Preview on blog
How should we arrange url paths in navbar:
<nav class="navbar navbar-expand-sm bg-light">
    <!-- Links -->
    <ul class="navbar-nav">
        <li class="nav-item">
            <a class="nav-link" href="{% url 'index' %}">Home</a>
        </li>
        <li class="nav-item">
            <a class="nav-link" href="{% url 'about' %}">About</a>
        </li>
        <li class="nav-item">
            <a class="nav-link" href="#">Link 2</a>
        </li>
        <li class="nav-item">
            <a class="nav-link" href="#">Link 3</a>
        </li>
    </ul>
</nav>
That's wunderbar. Now, let's create post list as view. We will do that in the index view. Let's import models in the views.py:
from django.shortcuts import render
from .models import Post

# Create your views here.
def index(request):
    # get all posts from database
    posts = Post.objects.all()

    context = {
        'posts': posts,
    }
    
    return render(request, 'index.html', context)

def about(request):
    return render(request, 'about.html')
Let's iterate these posts in the index.html:
{% extends '_base_layout.html' %}

{% block content %}
<div class="row">
    <div class="col-sm-9">
        {% for post in posts %}
            <div class="card">
                <div class="card-body">
                    <h5 class="card-title"> {{ post.title }} </h5>
                    <p class="card-text"> {{ post.content }} </p>
                    <a href="#" class="btn btn-primary">Read more..</a>
                </div>
            </div>
        {% endfor %}
    </div>
    <div class="col-sm-3">Sidebar</div>
</div> 
{% endblock %}

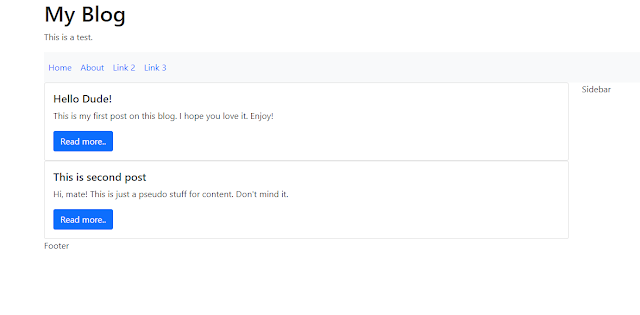
Let's look at the result:

Preview on blog

Let's add some posts on the admin panel and let's look at the again:
Preview on blog

That's okay but there is a problem ordering. The last post should be top on the older posts. Open the models.py in the application folder and add this meta setting to solve this problem:
class Post(models.Model):
    title = models.CharField(max_length=400)
    content = models.TextField()
    pub_date = models.DateTimeField(auto_now_add=True)
    categories = models.ManyToManyField(Category)
    author = models.ForeignKey(User, on_delete=models.CASCADE)
    
    def __str__(self):
        return self.title
    
    class Meta:
        ordering = ['-pub_date',]
Now, we solved that problem. So, what we are going to do? When we click the post title or "read more" button, we must get detail of this post. I will add new view function as detail:
def detail(request, pk):
    post = Post.objects.get(pk=pk)

    context = {
        'post' : post,
    }
    return render(request, 'detail.html', context)
Add this view on the urls.py file in the application:
urlpatterns = [
    path('', index, name="index"),
    path('about', about, name="about"),
    path('post/<int:pk>', detail, name="detail"),
]
We have to create a template file called detail:
{% extends '_base_layout.html' %}

{% block content %}
<div class="row">
    <div class="col-sm-9">
        <h1>{{ post.title }}</h1>
        <p>{{ post.content }}</p>
    </div>
    <div class="col-sm-3">
        sidebar
    </div>
</div> 
{% endblock %}
Let's edit index.html again according to this:
{% extends '_base_layout.html' %}

{% block content %}
<div class="row">
    <div class="col-sm-9">
        {% for post in posts %}
            <div class="card">
                <div class="card-body">
                    <h5 class="card-title">
                        <a href="{% url 'detail' pk=post.pk %}">{{ post.title }}</a> 
                     </h5>
                    <p class="card-text"> {{ post.content }} </p>
                    <a href="#" class="btn btn-primary">Read more..</a>
                </div>
            </div>
        {% endfor %}
    </div>
    <div class="col-sm-3">Sidebar</div>
</div> 
{% endblock %}
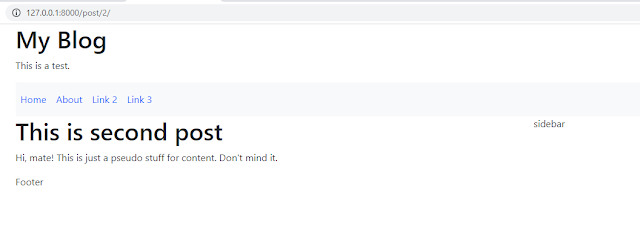
Now, let's run the server:
detail of post

Finally, we made this. I think this is enough as I beginner. I learnt too much things when I type this blog post. I hope it will help you. I will keep going learn and share my experience on this blog. I will develop this project as much as I can. 
Read more »